Spin a Wheel
Let's explore more of the blocks in the Gizmo block library. In this tutorial, we'll cover how to control motors with the Gizmo. For this, we'll make use of a VEX MC-29 motor controller. These motor controllers use a Pulse Width Modulation (PWM) signal to determine direction and magnitude of the motor rotation they control.
The Gizmo Motor and Servo Blocks
The Gizmo block library handles all of the PWM details for you with two command blocks: Set Servo To Position and Set Motor To Speed. Each of these blocks has a drop down menu to pick the Gizmo port and a number input for the position or speed.
The motor block accepts speeds from -100 to 100.

The servo block accepts positions from -90 to 90.

Sweeping Motor Speeds
This example program runs a motor on Gizmo's motor port 1 through the full range of its speeds.

This program begins with a When Started hat block that will run the stack when the program starts running. Underneath that, we have a Forever loop to keep our program running the whole time the Gizmo is powered on.
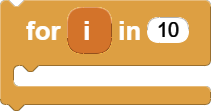
Within the Forever loop, there are two For loop blocks. This block repeats the stack of blocks within it a specific number of times. It does this by tracking a loop variable, which is named "i" by default. Each time the loop repeats, the loop variable will increase by 1. The input value of the loop block sets the value on which the loop will stop.
note
Unlike most text-based programming languages, MicroBlocks for loops start counting at 1. So, a loop block with end value set to 10 will count 1 through 10 inclusive.
In our case, we've replaced the stopping number with a Range block. This block changes the behavior of the For loop block. With the Range block, we can change the starting point of our for loop. In our example program, we loop through numbers from -100 to 100 in our first For loop, driving the motor from full reverse to full forward. In the second For loop, our range is set up to count in the opposite direction.

The black arrow on the right side of the Range block is a button that will expand the block to show optional inputs. For the Range block, the optional input controls the step size of the loop. For example, if we wanted to count even numbers from 2 to 10, we would want to add 2 to the loop variable for each loop.

In each For loop, we have a Set Motor To Speed block and a Wait Milliseconds block. The motor block will set our motor speed to the value of the loop variable. To use a loop variable as input to another block, you can drag the orange loop variable block from the loop to the block where you want to use it. The wait block is there to give our motor time to react to the new control signal.
To see this program in action, attach a motor to your Gizmo's first motor port using a Vex MC-29 motor controller and run the program. The motor should speed up and slow down over and over, changing directions each time.
note
Motors take a lot of power. Way more than can be safely pulled out of the USB ports on your computer. To run this program, you'll need to have a battery conected to your Gizmo board. Check the instructions around the Main Power Connector for more information on connecting this cable.
Recap
In this tutorial, we learned how to control a motor with the Gizmo block library. We also learned how to use For loop blocks and Range blocks to iterate over a range of numbers. We're just a few steps away from writing code to control our robot with a gamepad, in the next tutorial.